SBL Mega
SBL Mega
Parts
Notes
5V power supply
Testing 5V power supply
Processor
Testing the processor
10V power supply
Testing 10V power supply
Drivers
Testing Drivers
MOSFETs
Testing FETs und EMF
Completion Mega1
Completion E Mega2

As replacement for the well known Classic 2 Jo Aichinger has developed the SBL-Mega. The Software is based on the SBL-Micro used worldwide with great success.
Here is a direct link to Jo’s SBL-Mega Support page (currently in German only)

Some important features:

  • 6 - 12 cells / 2 - 4 Lipos
  • 40A/70A/100A
  • BEC
  • Active rpm control
  • Car mode
  • Proportional brake
  • Active freewheeling
  • Updates via Internet available

On the following pages you’ll find detailed building instructions which should lead to early success.

If you are interested in a kit or have any further questions, contact me at sbl@radetzki.info. I’m organizing collective orders if enough people are interested.

You can download the using instructions written by jo (including the latest version of the PC Setup program) hier herunterladen. Sorr, but currently only a German version is available.

If you find any errors on these new pages don't hesitate to inform me. Correction are always helpful for all readers. Some people read this pages to find the last errors but i can still not guarantee that there aren't errors left. If you have problems while building the controler, send me a mail. I'll try to answer any question..

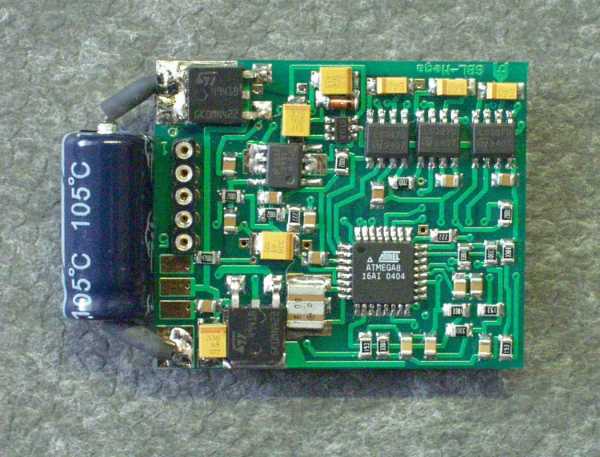
For building the SBL-Micro you should have printed out the building instructions, the layout plan and the list of parts. Mark every part you have placed on the board on the parts list and may be on the layout plan. This is a way to keep the overview. If you do it this way it’s easy to check if no part is missing on the board.

There often the question if an oscilloscope is really necessary to build the controller. The answer is easy. An oscilloscope is not necessary but very helpful if the controller does not work as expected.
It is possible to us a software solution instead. This uses the LineIn plug of the soundcard . I placed a link to such a software on the download page.

Hint: The used SMD electrolytic capacitors are Tantal capacitors. The line on the capacitors marks the (+) side.

Please clean the board carefully with alcohol before soldering


Needed tools:

  • Very fine soldering iron or needle for the small SMD parts
  • A stronger soldering iron for the voltage controllers ans FETs
  • Soldering tin 0,5mm
  • Circuit analyzer
  • Oscilloscope (optional)
  • Alcohol to clean the PCB